
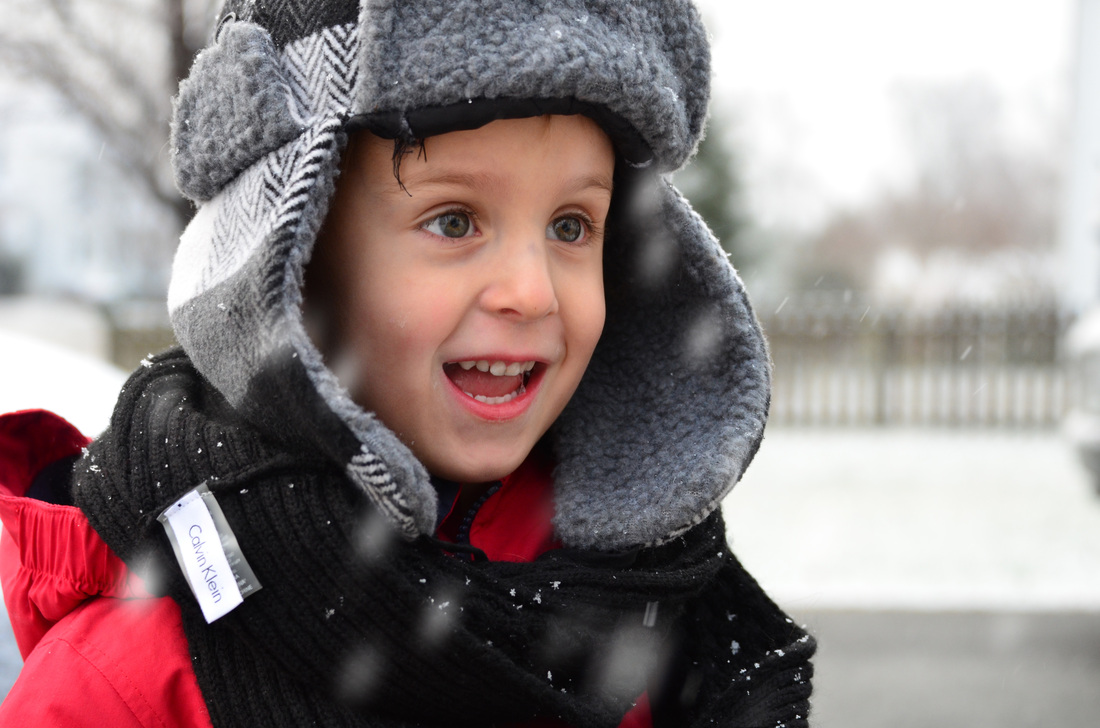
What do you think? Does it look like J excited about the snow?
Well, he was. It was a beautiful day, new snow, J was so excited and i wanted to capture the moment.
I captured his expression of excitement and wonder, but in the original shot (below) there was almost no snow falling...
So today, I will add it using Photoshop Elements... (clearly, i am not a "Photo Purist")
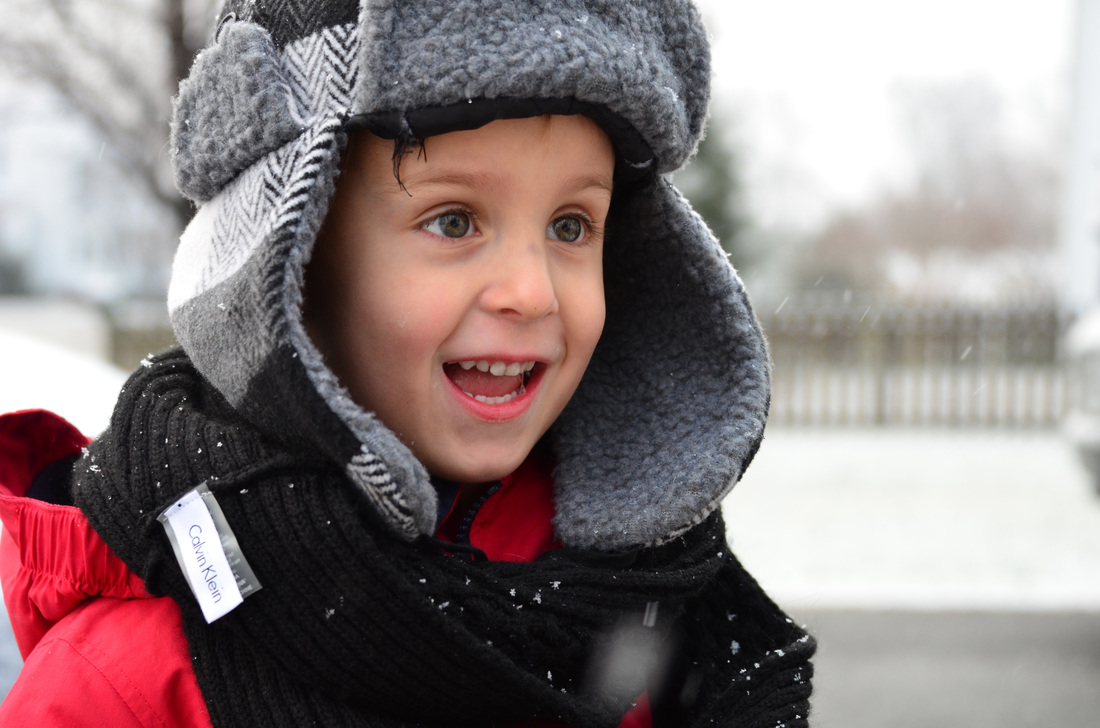
Here is the original. Literally, there was one single flake in the foreground. Not exactly the right amount to prove beyond a reasonable doubt that it was, indeed, the snow that J was happy about.
Well, he was. It was a beautiful day, new snow, J was so excited and i wanted to capture the moment.
I captured his expression of excitement and wonder, but in the original shot (below) there was almost no snow falling...
So today, I will add it using Photoshop Elements... (clearly, i am not a "Photo Purist")
Here is the original. Literally, there was one single flake in the foreground. Not exactly the right amount to prove beyond a reasonable doubt that it was, indeed, the snow that J was happy about.
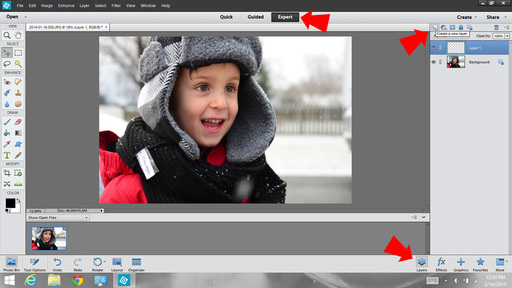
Step 1: New Layer
(I am using PSE 12 here)
Make sure you are in 'expert' mode, and have the 'layers' palette selected.
Now, create a new layer by checking the white box in the upper left of the Layers palette.
Select the new layer and draw a circle shape.
(I am using PSE 12 here)
Make sure you are in 'expert' mode, and have the 'layers' palette selected.
Now, create a new layer by checking the white box in the upper left of the Layers palette.
Select the new layer and draw a circle shape.
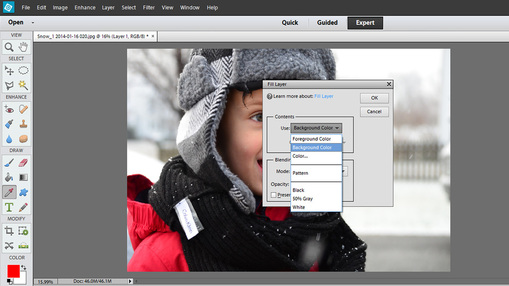
Step 2: Fill Circles
Once your circle is created, select Edit > Fill Layer and fill the circle with 100% white.
For me, white happens to be the background color, so i select 'Background Color.'
(Looking in the lower left, you can see that red is the front color, white is the back. Hence, foreground/background.)
Once your circle is created, select Edit > Fill Layer and fill the circle with 100% white.
For me, white happens to be the background color, so i select 'Background Color.'
(Looking in the lower left, you can see that red is the front color, white is the back. Hence, foreground/background.)
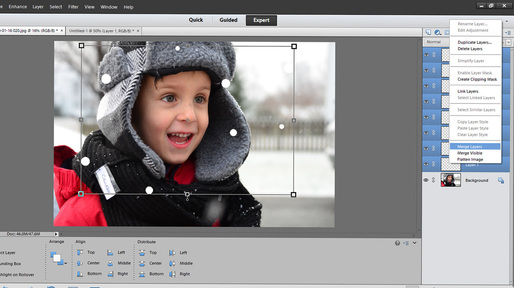
Step 3: Add and merge circles
Using copy/paste, or 'duplicate layer' from the layer options, create a bunch of white circles. Make some larger, some smaller, and position them randomly.
Once you have a slew of circles, hold the shift key and select each layer that has a circle. Then, right click and scroll down to merge. This creates one layer of circles
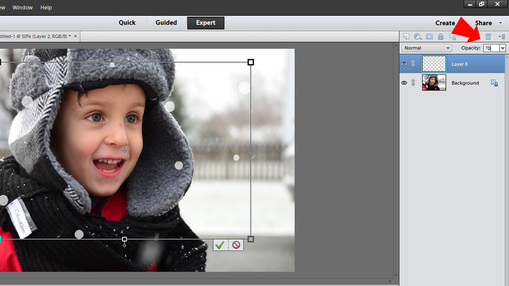
Step 4: Opacity
Now you want to change the opacity. You can mess with this later on as well, but i just do it up front and then fine tune.
Select the layer, and click 'opacity' in the upper right of the Layers palette. I chose 70% to start.
Now you want to change the opacity. You can mess with this later on as well, but i just do it up front and then fine tune.
Select the layer, and click 'opacity' in the upper right of the Layers palette. I chose 70% to start.
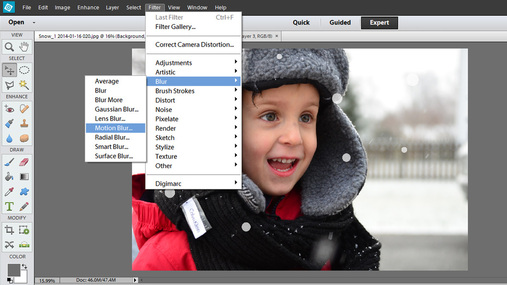
Step 5: Blur
There are 2 blur steps. First, with your layer selected, choose Filter > Blur > Gaussian Blur. This filter allows you to select to what extent you blur the circles. (I applied a fair amount to mine... 250-ish)
Next, choose Filter > Blur > Motion. You can see in the one real flake, that there is downward movement, so we want to recreate that action.
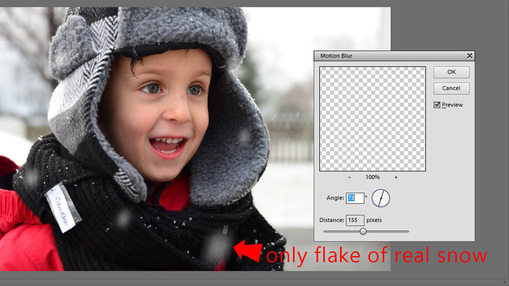
Step 6: Choose the angle
Motion blur lets you choose the angle and agree of motion you want to see. In my case, i have a point of reference with the real flake. But you can choose any angle that looks good.
Note: if you don't apply the Gaussian blur first, you will notice that the motion blur gives you a weird pattern.
Motion blur lets you choose the angle and agree of motion you want to see. In my case, i have a point of reference with the real flake. But you can choose any angle that looks good.
Note: if you don't apply the Gaussian blur first, you will notice that the motion blur gives you a weird pattern.

Step 6: Duplicate
Once i had some nice looking snow, i duplicated the snow layer a few times and adjusted each differently, such as moving it around, applying different opacity and flipping it 180 to give me a variety in the snow patterns.
Once you select the right amount of snow, you are done.
Select Layer > Flatten Image and then you can save.
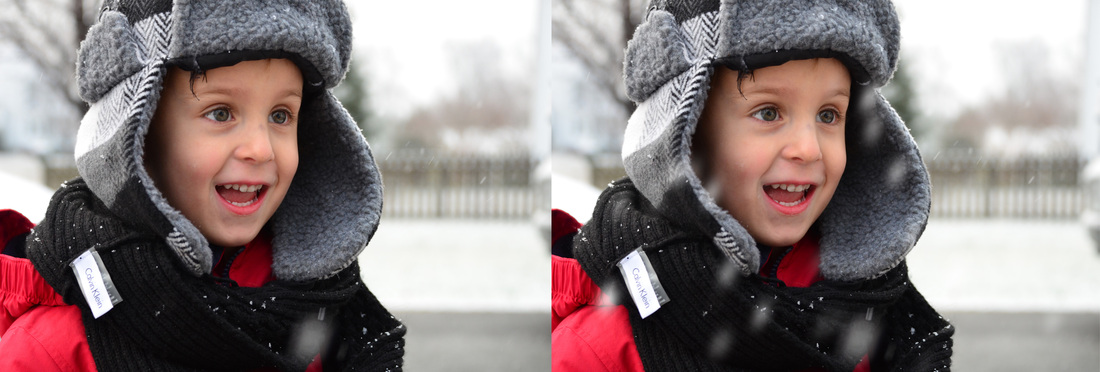
Here is the before and after. The effect is subtle, but in the end, i do think this snow treatment enhances the photos' story.
Now, i just need to delete the Calvin Klein tag on the scarf. Ah, my work is never done.
Now, i just need to delete the Calvin Klein tag on the scarf. Ah, my work is never done.
FL: 55mm, f/4.5, exp. 125, ISO: 640
 RSS Feed
