
While i was putting together the 'snow' tutorial, i created these little red arrows to point to specific things in the PSE menus and realized 'hey! i can make this into a brush and make my life so much easier!'
And so i did... and here's how (it is so easy!)
And so i did... and here's how (it is so easy!)
Step 1; Create the Image
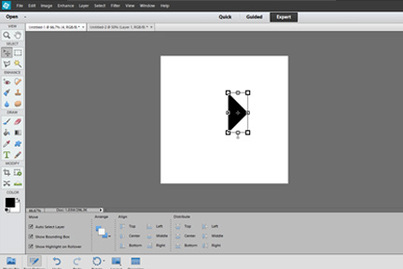
I create the tip of the arrow using Web Dings 4 in black.
Its a good idea to make the brush relatively large from the start. While you can re-size it as a brush, like any image, it will get pixelated if you go from small to large, versus going large to small.
I create the tip of the arrow using Web Dings 4 in black.
Its a good idea to make the brush relatively large from the start. While you can re-size it as a brush, like any image, it will get pixelated if you go from small to large, versus going large to small.
Step 2: Create the image
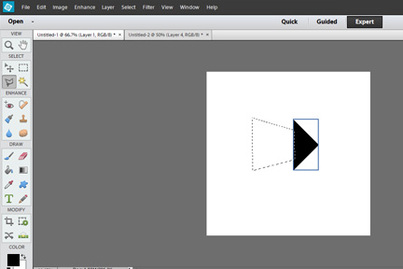
Next i draw the back of the arrow, using the straight line drawing tool. It takes a little adjusting to get it right, but once it is created, select Edit > Fill Layer and fill the selection with black.
Next i draw the back of the arrow, using the straight line drawing tool. It takes a little adjusting to get it right, but once it is created, select Edit > Fill Layer and fill the selection with black.
Step 3: Create the brush
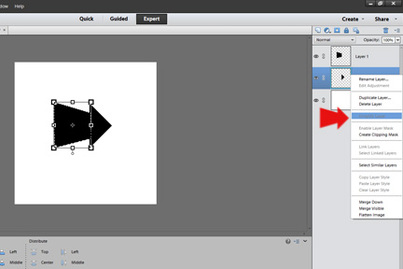
Once the basics are created, 'simplify' the text in the Layers Palette and merge all the pieces of your brush.
Once the basics are created, 'simplify' the text in the Layers Palette and merge all the pieces of your brush.
Step 4: Make Brush
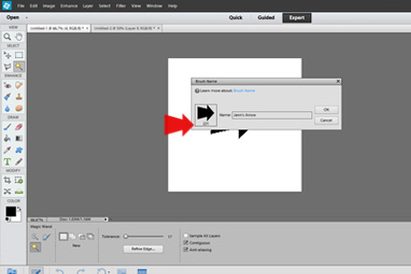
To make the actual brush, select your image, then go to Edit > Create New Brush
Here is where you will name your brush.
The numbers under the image reflect the pixel width of the brush... again, you want to go larger here, rather than smaller.
To make the actual brush, select your image, then go to Edit > Create New Brush
Here is where you will name your brush.
The numbers under the image reflect the pixel width of the brush... again, you want to go larger here, rather than smaller.
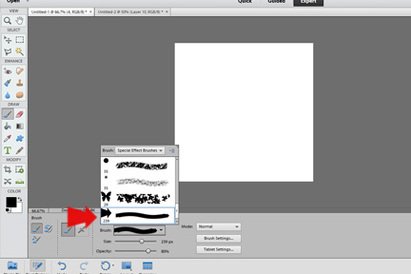
Step 6: Choose Brush
Finally, select the brush tool, choose 'Brush' in the brushes menu and scroll to the end.
Here you will see your new brush!
Its that simple!
Finally, select the brush tool, choose 'Brush' in the brushes menu and scroll to the end.
Here you will see your new brush!
Its that simple!
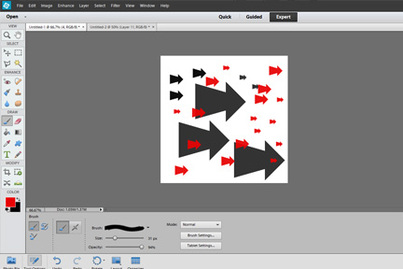
Arrows Galore!
As you can see, in the brush control you can change the size, color, opacity... like any brush.
And you can turn just about any black and white image into a brush.
Go on, have some fun! I think i will try to make a brush out of my son's face. That would be fun!
As you can see, in the brush control you can change the size, color, opacity... like any brush.
And you can turn just about any black and white image into a brush.
Go on, have some fun! I think i will try to make a brush out of my son's face. That would be fun!
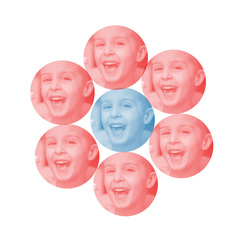
UPDATE: You can totally make brushes with photos too! Change the image to grey scale, select the portion of the photo you want as a brush, and follow from Step 4 above.
 RSS Feed
